A guest post by Liz Smith, a children's librarian.
Looking for something to keep the kids occupied? Make some puppets and put on a show! Puppets can be made out of materials you likely already have at home. 
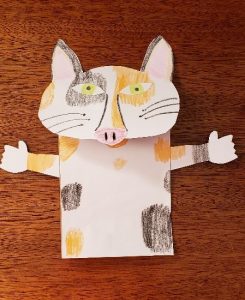
Paper lunch bags can make great puppets for younger children. Cut a few inches off the top of the bag so the puppet will fit more comfortably on your child’s hand. The bottom of the bag will be the upper part of the face and the fold is the mouth. Place the tongue under the flap so it is hidden when the mouth is shut. You can decorate the bag itself or cover it with paper first. If you want to make arms, be sure to make them a little long so you can glue them in the side folds. Attach the arms to the side of the crease closest to the front.
To make it easier, you can find printable templates here.
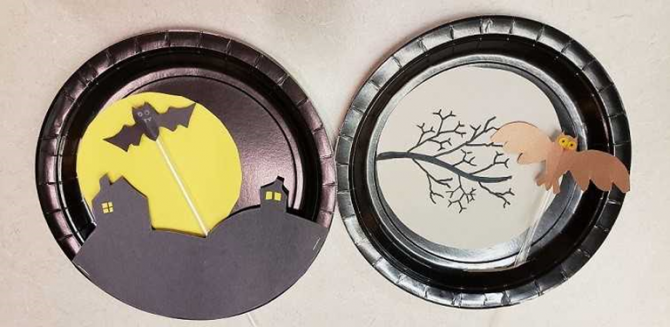
You can turn any picture into a puppet by simply taping a stick or straw on the back. Be creative! Your puppet could be a person or animal, but it could also be a plane, car, boat, train engine, or anything else that moves. For more of a challenge, create a stage or backdrop for your puppets using a paper plate.

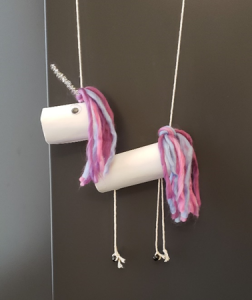
Older children may enjoy making marionettes out of toilet paper rolls and string. These instructions are for making a four-legged creature. To make the body, cover one toilet paper roll with paper. Punch a small hole at one end of the roll for the neck and one at the other end for the string. If you have a pipe cleaner, use a short piece for the neck; otherwise, use string or some other material that will attach the head securely to the body. 
Cut a second toilet paper roll to make the head. The size will depend on the creature you are making. Cover the roll with paper. Punch two small holes on opposite sides of one end of the roll. One hole will be for the neck and the other for the string. Decorate the head with eyes, ears, etc. If you’d like to, you can decorate the body as well.
Thread the neck through the head and secure it with tape inside. Do the same to attach the other end of the neck to the body. Thread a piece of string through the tail end of the body and secure it with tape. Tie the other end of the string to one end of a stick. Thread a shorter string through the hole on top of the head and secure it with tape. Tie the other end of the string to the other end of the stick. You may need to adjust the length of the string so the creature will hang levelly.
There are lots of fun and different ways to create legs for your creature. If you have beads or buttons that you can use as feet, you may want to use string for the legs. To do this, punch two small holes side by side on the bottom part of the body— do this on both ends. Tie a bead or button to one end of a piece of string. Thread the other end of the string up through one hole then back out the other hole on one end of the body. Attach a bead or button to that end of the string. Repeat this process on the other end of the body. Adjust the string so the feet hang evenly. If you don’t want to use string, you can make the legs from long strips of paper. Fold each strip accordion-style and attach it to the underside of the body.
Use your new puppets to act out your favorite story or invent one of your own. Whatever type of puppet you create, the most important thing is to have fun! Here are a few items to check out for more inspiration:


Add a comment to: Boredom Busters for Kids